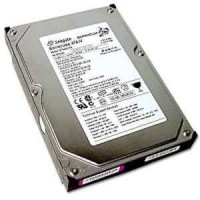
 I recently received a nice gift from a friend, a 1TB hard drive. Yes, I have a nice friend. I bought an external enclosure case for this drive from www.newegg.com and installed the drive in the enclosure. Next, I attempted to use the drive on my XP Professional based computer. After plugging in the USB adapter my system did recognize the drive, but I was not able to view it in “My Computer.” No drive letter was assigned to it. So off to the handy Administrative Tools -> Computer Management -> Storage -> Disk Management tool. The drive was in the list of drives but labeled “GPT Protective Partition.” There was no way available to format this drive with the Disk Management tool.
Doing some research my understanding is that this drive was formatted in a Mac or 64bit system. Thus the GPT Protective Partition. I did find a solution and I share it here:
How to change a GPT Protective Partition to one usable in Windows XP:
We will be using Windows XP diskpart tool to clean this drive which will remove all data and partition structures from the disk. Then XP’s Administrative Tools to initialize and format this GPT disk to a XP usable MBR disk.
1. Go to XP’s Command line (click on “Start Menu,” then “Run,” type in “cmd” in textbox, and hit “OK”)
Type in “diskpart” in command line.
Type in “list disk” in command line to show all disks in this machine.
Use “select” to set the focus to the specified partition, for example “select disk 7” (as mine was listed).
Use “clean” command to remove GPT disk from the current in-focus disk by zeroing the sectors of the drive.
2. Go to “Disk Management” in “Administrative Tools.” You will see the disk is “unallocated” now. Right click on disk info, choose “Initialize Disk.”
3. Right click on disk info again and choose “Format Disk.” You can assign any unused drive letter during this step. The disk will proceed to format, depending on the disk size this will take some time. Do not turn off your computer till this step is completed.
4. When finished the drive will now be list in “My Computer” and be usable on your XP sysytem.
Warning: This procedure erase all data on the selected disk!
or you could use gparted and format the drive immediately.
True, but the steps above are quicker than booting up the system with a bootdisk containing gparted. Thanks for the tip off to that product though!